Last Updated on February 17, 2022 by Rick V
In this 2 part series learn using an illustrated, step-by-step, walk-through of my procedure for processing hydrogen-alpha solar images.
by Rick V
In hopes of sparing others the frustrations encountered along the way, I’d like to share some of the information gleaned while on my own journey to solar Nirvana. Hopefully, fellow travelers will find this material useful. If you learn something of value, share it with others… and we all grow in the process! This guide is intended to provide an overview of basic and advanced Solar H-a imaging techniques, equipment foibles, processing tips, and a few tricks of the trade. With so many facets to cover, this will be more of a summary than an in-depth tutorial. If the
interest is there, we can delve deeper into the individual topics at a later date.
The format is flexible and intended to be very informal, so if you have any questions or comments along the way, feel free to jump in and fire away!
Images used in this presentation were captured via consumer-grade digital cameras (Nikon CoolPix995, Canon D60, or Canon 10D), webcam (TouCam II 840 Pro), and a dedicated astro-CCD (SBIG ST11K).
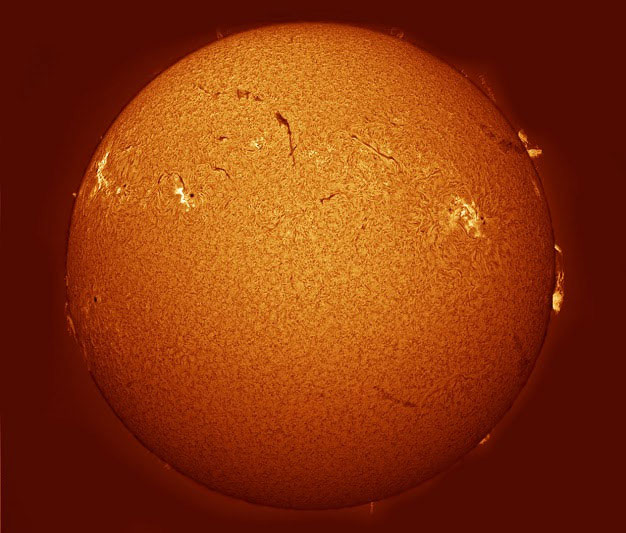
Before we dig in, let’s take a quick peek at what we will strive to accomplish: ultra-high resolution imaging with repeatable results (consistency!)
You have a solar H-a setup… now what?
Some of the most daunting experiences an aspiring astro-imager might ever suffer through are those associated with extreme narrow-band imaging. Such is the task of
capturing solar H-a images: what you see in the eyepiece is not necessarily what you’ll capture in the image. Indeed, I’m one of those who was vexed by the nuances of the
medium, moving between cameras, peripheral equipment, and processing techniques in attempts to adequately capture what was readily seen in the eyepiece. After much angst, and through the helpful support of others, I can happily report that it is in fact possible to consistently capture far more H-a detail than the eyepiece reveals.
1.) Capture a video of the Sun
Scope: I use a Lunt LS50THa/B600 telescope (Focal Length = 350mm, F/7, 50mm diameter lens)
Camera: Celestron NexImage 10 color solar-system video camera (10 Megapixel, 1.67 micron pixels)
Match of Scope & Camera
For acceptable resolution, the sampling criterion is F#/pixel size (microns) = 3.5 min to 5.0.
Less than 3.5, image resolution suffers. More than 5.0, there is no increase in resolution.
Here the scope is F/7 and the camera has 1.67 micron pixels.
So the F#/pixel size = 7 / 1.67 = 4.19… just about perfect
Video Codec Choice
The iCap 2.3 Software that came with the NexImage 10 video camera allows a choice of codecs – depending also on what codec packages are installed upon your computer. The default codec is uncompressed RGB24. However I am capturing large images – 2400 x 2400 pixels. Further, even with short 30 second videos at 12 frames per second, the file size is large – about 6 GB! Instead, here I chose to use the Y800 codec. Y800 is an uncompressed black & white codec from which the color information may be recovered later. The Y800 file size is 2 GB or about 1/3rd the size of the RGB24 files.
Exposure Range
I like to capture images over a range of exposures, separated by about 1.4x in duration.
e.g. If the sun looks good at say 1/200s (5ms), then I will bracket my exposures as follows:
1/37s 26.6ms
1/50s 20ms
1/75s 13.3ms
1/100s 10ms
1/150s 6.6ms
1/200s 5ms
1/300s 3.3ms
1/400s 2.5ms
1/600s 1.6ms
1/800s 1.25ms
The longer exposures are useful for properly exposing the prominences.
The shorter exposures are useful to avoid over-exposure of the sun’s center.
2.) Stack the images in AutoStakkert 2.6.8 (AS!2)
Stacking software converts a multi-frame video (avi) into one good quality, low-noise image; I like tiff files. Here, I chose to stack the best 80% of my 360-frame-video files.
I like AS!2 because it allows me to load my videos and walk away as it processes one-after-the-other as I do other things – like sleep!
For solar images without much surface details (like here), I prefer using AS!2’s Image Stabilization “Planet” and Quality Estimate “Edge”. I set my own alignment points around the perimeter – using high magnification.
Note the overlap of the alignment boxes (one must do this else lose registration of the images).
Note the RGB Align box is not checked (one must do this for Ha solar images else lose registration).
At this point, I view the AS!2 images, one after the other in free software called IrfanView. I scan the images looking for the best surface image and the best prominence image. I picked image #73 for surface and image #77 for prominences.
3.) Wavelet sharpening in Registrax 6
Registrax 6 can sharpen images no larger than 2048 x 2048 pixels. My images are usually 2400 x 2400 pixels. Prior to processing my images in Registrax 6, I reduce the image size to 2048 x 2048 pixels.
Note: Based upon my tests, it’s best to reduce the size of the images using Photoshop CS4 – using the “Bicubic Sharper (best for reduction)”.
Alas, the images here were reduced in size using IrFanView and are not as sharp as they could have been.


