


Last Updated on February 23, 2022 by Practical Astrophotography Staff
Astrophotography is one of the most exciting and inspiring hobbies that a person could pursue. It is truly a blending of science and art. Few things are more rewarding than obtaining detailed images of celestial objects. Unfortunately, it can also be one of the most demanding and frustrating undertakings one could make. It requires a perfect confluence of personal skills, clear weather, and dark skies (lunar and planetary imaging may be the exception here). Still, this hobby need not be so cumbersome. And you don’t need to invest thousands of dollars into equipment. There are some relatively easy and fruitful ways to begin capturing images.
CAMERA AND TRIPOD
One of the easiest ways to enter the field of astrophotography is to mount a camera and lens on a tripod and take a brief time exposure. The camera should have a Bulb (B) setting. This will allow you to keep the shutter open with a remote release. A remote timer release is essential even if you are taking shorter exposures as it is almost impossible to manually release the shutter without degrading the image.
Using a camera and tripod, you can record far more stars than are visible to the naked eye. However, there are distinct limits to how long your exposure can be before the stars begin to look like streaks rather than points of light. This is due to the rotation of the earth on its axis. The length of time that you could expose the film before trails start to appear depends on the focal length of the lens you are using and the section of the sky you are photographing. Stars near the pole move a much shorter distance than do stars near the celestial equator.
Below is a table that lists the maximum exposure time (in seconds) before star trails begin to form when using a 35mm camera: Of course, there may be times when you want to capture the effect of star trails. In this case, it is best to use a low ISO setting and leave the shutter open for many minutes, even hours. Also, star trails are not a problem when you are attempting to capture meteors on film. In any case, do not be too quick to overlook or underestimate this method. You can obtain some nice shots with a minimum of effort or expense.
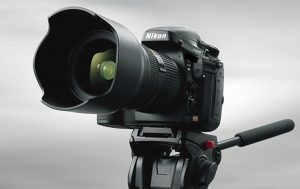
PIGGYBACK PHOTOGRAPHY
The piggyback method of astrophotography is so named because you attach your camera atop a telescope that is clock-driven on an equatorial mount. This technique allows you to capture much fainter stars than would be possible with just a camera and tripod. It is still very easy to accomplish. Several types of mounting brackets are commercially available to fit most telescope tubes. Some telescope tube rings already come with a 1/4-20 threaded bolt to hold a camera body. You should be cautious using this method with lenses that exceed 300mm focal length. Beyond this (unless you have an exceptional mount), additional guiding would be necessary.
Note that the foreground tends to become blurred during piggyback exposures. While the telescope’s clock drive keeps the stars from trailing on the film, it causes any fixed objects to gradually distort. The longer the exposure, the more noticeable the distortion.
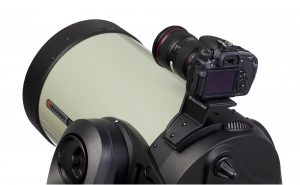
PRIME FOCUS
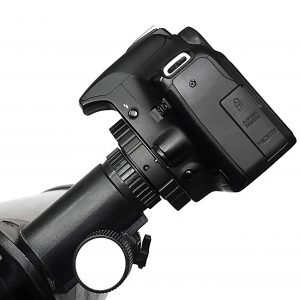
Most of the images contained in this site were obtained through the prime focus method. In this technique, the camera body is directly attached to the rear of the telescope tube. Many types of telescopes are suited for prime focus shots and camera adapters are available for each of them. The telescope essentially acts as a camera lens. The image size and field of view are determined by the focal length of the telescope. The f/ratio of your setup is simply the diameter of your telescope’s objective lens divided by its focal length. Occasionally, one may use a focal reducer to provide a wider field of view as well as allow for shorter exposure times.
This method requires additional guiding of the telescope during long exposures. We cannot just trip the shutter and sit back because no clock drive is totally accurate. There is a periodic error in the gears that drive the shaft. This causes the drive to run a bit slower or faster than ideal. Even if a perfect clock drive existed, atmospheric refraction would cause a shift in the apparent location of an object over time.
Accurate polar alignment is essential before any time exposure can begin. If the mount is not aligned properly, the starfield would appear to rotate around the object you are photographing, regardless of how well you guide the scope. The results would look similar to those you would obtain by taking a long exposure of Polaris with a camera and tripod. Some people overcome this problem by layering a still shot of the background onto the night skyline.
Once you have polar aligned your telescope mount, you are ready for prime focus astrophotography. There are basically two methods used to make fine-tuning in our guiding: 1) a separate guide-scope or, 2) an off-axis guider. Each has its merits and problems. A separate guide scope makes it much easier to locate a suitable guide star. But the guide-scope must be securely attached to the main telescope or mount. Otherwise, differential flexure will likely occur. This means that gravity will pull the various components on the mount unevenly. Although the guide star may not move as viewed by the guide scope, it would move in relation to the main scope. Isolating the source of flexure can be difficult. An off-axis guider avoids this problem. It is inserted between the telescope and the camera and a small prism deflect a portion of light from the edge of the telescope’s actual field of view. Guiding is much more accurate with this approach. However, it does make acquiring a guide star more difficult, particularly if you are imaging an object that is far from the galactic equator.
EYEPIECE PROJECTION
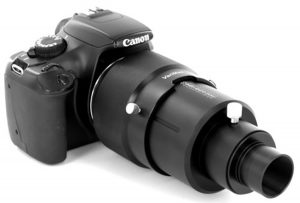
There will be times when you will want to obtain a larger image size than is possible through prime focus photography. This is most often the case in planetary or lunar photography. Eyepiece projection
is the preferred method in these situations. This method requires a fairly inexpensive camera adapter that allows you to place an eyepiece (or Barlow lens) between the telescope and camera. The image is projected onto the film plane. This drastically increases the f/ratio of the system and is therefore not typically suitable for deep-sky photography. To determine the effective f/ratio or overall focal length of your system, use the following formula:
Effective f/ratio = f/ratio of telescope x
[(d – FL of the eyepiece)/ FL of eyepiece]
Effective FL = FL of telescope x
[(d – FL of the eyepiece)/ FL of eyepiece]
where d is the distance between the field stop of the eyepiece and the film plane. For example, using an f/8 1200mm FL scope with a 12mm eyepiece that is 70mm from the film plane:
f/ratio = 8 x [(70 – 12)/12] = 8 x (58 /12)
= 8 x 4.83
= 38.64
The effective FL would therefore
be 1200 x 4.83 = 5796mm
You can also use a Barlow lens for what is called negative projection. The formula for figuring out the effective f/ratio is identical to that used with eyepiece projection except for the fact that a Barlow lens has a negative focal length; that’s why it’s called negative projection.
The following table lists the proper exposure time (in seconds) for shooting various objects using an ISO setting of 200:
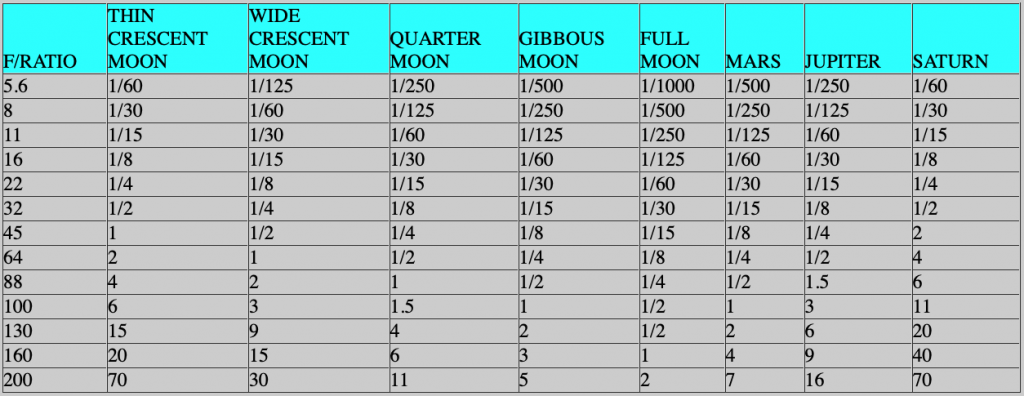
Remember that these recommended exposure times are figured for ISO setting of 200. If you are using a
different setting, you will need to make proportional adjustments. For example, if you are shooting at ISO 100, double the exposure time; if you are shooting at ISO 400, cut the exposure time in half. In any case, it is always a good idea to bracket your exposures. That is, shoot at one or two stops above and below the times that are recommended. This will assure a better chance of obtaining the correct exposure.


