


Last Updated on December 9, 2021 by Jeremy Hughes
False Inversion can make that ordinary Solar Image turn into an Extraordinary showpiece with just a few short and simple steps
by Jeremy Hughes
I recently did a blog post on creating false color solar images using Photoshop’s duotone and thought I’d extend it further into another interesting technique which puts a new spin on the method.
With this process we are doing a pretty simple thing – essentially inverting the image. In doing so, however, we are making the original black space around the object white, so an aggressive adjustment is needed to correct this.
I think this gives a really unique look compared to other solar images, and I prefer the contrast it gives in general. One more advantage is the prominences become visible through the method of inverting the weaker dark data. The prominences you see in the example I’ve given simply aren’t visible without inverting unless they are processed and stretched out.
Other notes: It’s possible to do this method without resorting to Curves, which admittedly can get a bit messy. I suppose you could do a color replacement or select the sun area only with a selection tool or Magic Wand in Photoshop, but these two alternatives involve separating pixels and subjecting the blend to tears. I think the Curves method allows a smoother blend even though what’s applied is quite an aggressive adjustment.
CURVES ADJUSTMENT
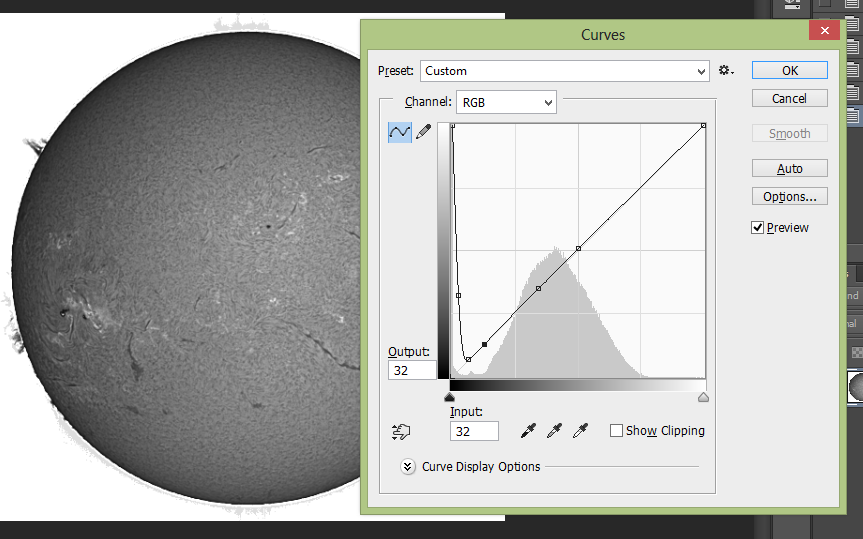
Open your captured image, assuming you’ve already merged, stacked and sharpened if you need to. We will need to make an original curves adjustment to invert the black background only. When you open curves (Image > Adjustments > Curves) you’ll see the main hump near the middle which is the signal data from the sun pixels and toward the left a thin but large spike which represents the black dark area around it. It’s this spike which we need to invert, and can do so by dragging the end curve point from the bottom to the top. In doing so the image will go crazy, so you’ll need to plot extra curve points to control the main curve so only the large peak is affected, and the rest of the curve remains on the original plot line (see below).
APPLY DUOTONE / FALSE COLOR
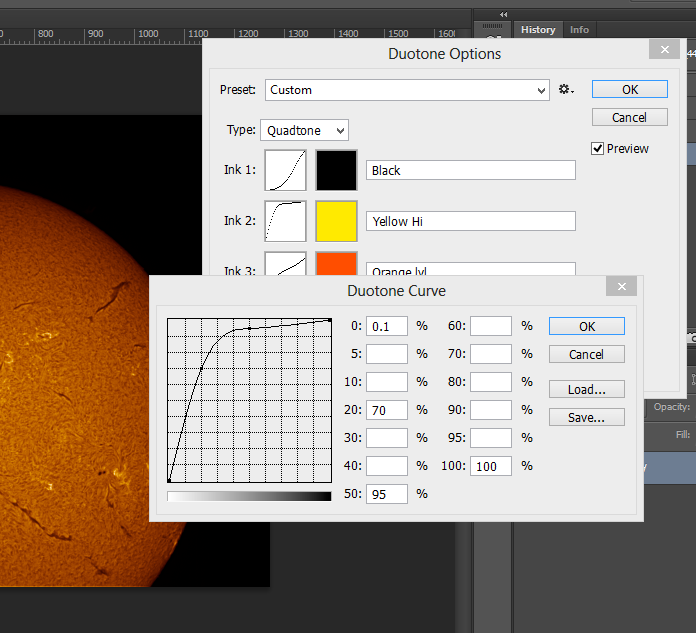
At this point, you can apply false colour as I demonstrate in my previous blog post on Duotone. I find the same red tone I use on my non-inverted solar images work best when It’s inverted too.


