


Last Updated on January 9, 2022 by Megan Solusky
Many Astrophotographers lean toward using Photoshop, but Lightroom can be easier and more intuitive to edit your Milkyway shots.
Post-processing is an extremely subjective part of any Astrophotographer’s workflow. By putting in days of practice, each Astrophotographer eventually develops a characteristic look that can be seen throughout many of their photos, whether that be high contrast, low contrast, highly saturated, monochrome, bright exposures, dark and moody exposures, or anywhere in between.
While there is no correct way to process a photo, most landscapes scenes can be readily viewed with the human eye. Because of this, viewers of an image can, in theory, compare the image to the real-life scene to know how far post-processing techniques moved a photo away from “reality.” However, since the Milky Way cannot be seen with the human eye like it can be with modern-day digital cameras, the range of different nuanced looks can be applied to a photo of the Milky Way without being restrained by what it *should* look like is endless. So, with this tutorial, in order to finish off my comprehensive guide to planning, photographing, and post-processing Milky Way photos, I want to take a close look at the potential effects of some of the editing tools that can be used to process an image of the night sky, instead of showing only one specific way to process an image.
The 3 Main Pillars of Milky Way Post-Processing
There are essentially three main pillars of post-processing that will affect the appearance of the Milky Way: White Balance, Contrast & Exposure, and Noise Reduction. So, I want to take a step-by-step look at each of them to show how different settings can affect the look of the Milky Way with regard to these three pillars. While any RAW processing software can edit a Milky Way photo, for this tutorial I’ll be using Adobe Lightroom and Adobe Photoshop. For the first part of our tutorial, we’ll be taking a look at the RAW file below, which was shot on a Canon 5D at 24mm, 3200 ISO, and f/2.8 for 30 seconds. I originally took this shot with the intention of stacking it with similar exposures, which is the reason for the high ISO and short shutter speed. This base file already has the lens profile correction for my lens added to it, which reduced some vignetting (darkening) that was visible in the corners of the image.
Based on how I processed the photo to my personal taste, the image below was my final result using only Lightroom. As we go through the editing process, I’ll try to show step-by-step how each adjustment affects both the base image and the final results. Keep in mind as we go along, however, that there is no incorrect way to process an image, and no correct order of operations when going through the editing process.
1.) Import your Photo
File>Import photos and Video to select The folder where the images you would like to import reside. Select the Milkyway photo you would like to import. This will bring the image into a Lightroom Catalog.
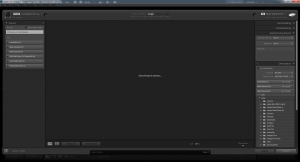
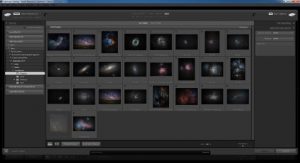
2.) Select your Photo
Once you have imported the photo into a Lightroom catalog you will see the library of photos you just imported. From here you can navigate to it and select the photo you would like to start developing and highlight it by clicking on the Thumbnail.
3.) Start Developing Photo
After selecting the photo click on the Develop tab in the top menu. This is the tab you will remain in while adjusting the photo. Lightroom calls this tab the “Develop’ tab. When you become more familiar with the use of Lightroom you can use presets and go back to previous edits using the “History” feature.
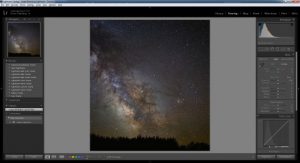
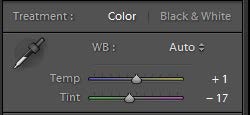
4.) Adjust White Balance
At this point, if your camera was set at the correct White Balance you may skip this step and leave the WB “as Shot” If the White Balance is not to your liking you can change it to “Auto” which usually does the job. This can be found under the Treatment heading. If you don’t like the look of the “Auto” White Balance you can choose “Custom” and drag your “Temperature” and “Tint” to the desired location based on your liking.


