


Last Updated on February 22, 2022 by Practical Astrophotography Staff
When shooting Astrophotography or even nightscapes you will see many benefits by tweaking your DSLR settings. Here are some tweaks that will help make your next night under the stars more enjoyable when processing your images.
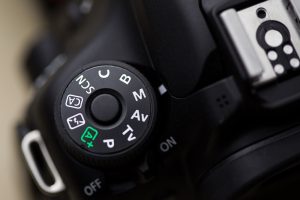
1.) Set your camera mode to Manual
Ensure your Tripod is pointed to true north by using a compass and aligning the tripod post to match the offset of your location. To find your True north offset you can use this website calculator – https://www.ngdc.noaa.gov/geomag-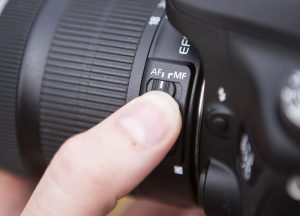 web/#declination
2.) Turn off auto-focus
Ensure your Tripod is level by adjusting the lengths of the 3 tripod legs before placing your mount on top of the tripod. You can also skip this step and just level the mount and tripod in one step using the built in bubble level on your mount
 3.) Set your white balance to daylight
Set to Daylight or use a custom white balance (especially if your camera is modified).
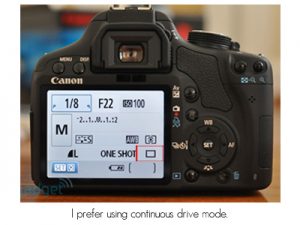 4.) Set your drive to one shot
Ensure your Tripod is level by adjusting the lengths of the 3 tripod legs before placing your mount on top of the tripod. You can also skip this step and just level the mount and tripod in one step using the built in bubble level on your mount
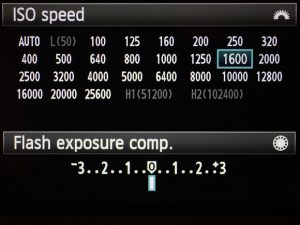 5.) Use Higher ISO
Yes, it’s true that a higher ISO does indeed produce more noise in a photo. Increasing exposure in post-processing produces a large amount of noise. Expose properly in camera to avoid it, and that often means a higher ISO.
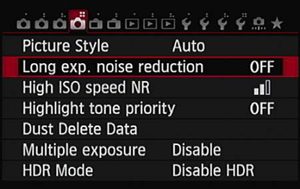 6.) Turn off long exposure noise reduction
Long exposure noise reduction, in theory, is a magnificent technology. When it is activated in camera, the camera takes a normal exposure and then goes blank as it takes a second, invisible exposure that you never see. Shooting a photo with long exposure noise reduction and then processing the photo in Lightroom or Photoshop will yield no benefit.
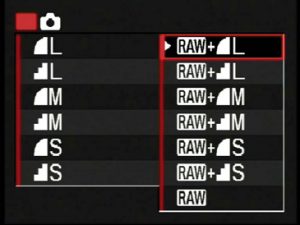 7.) Shoot Raw + Large File Format
Ensure your Tripod is level before placing your mount on top of the tripod. You can also skip this step and just level the mount and tripod ain one step


